Getting Started

Quick Start

Video guide

MoonShine - this is an admin panel for Laravel, which helps to quickly run MVP, Dashboard, CRM and CMS. Below - step-by-step instructions for installation and primary setting.

1. Installation

Laravel

Make sure you have Laravel 10.48+. Read more in the Laravel documentation

composer global require laravel/installer
 
laravel new example-app
 
cd example-app
composer global require laravel/installer
 
laravel new example-app
 
cd example-app

MoonShine

composer require moonshine/moonshine

Starter kit

If you already have laravel/installer, then you can install Laravel + MoonShine with a single command:

laravel new example-app --using=moonshine/app

2. Configuration

php artisan moonshine:install -Q

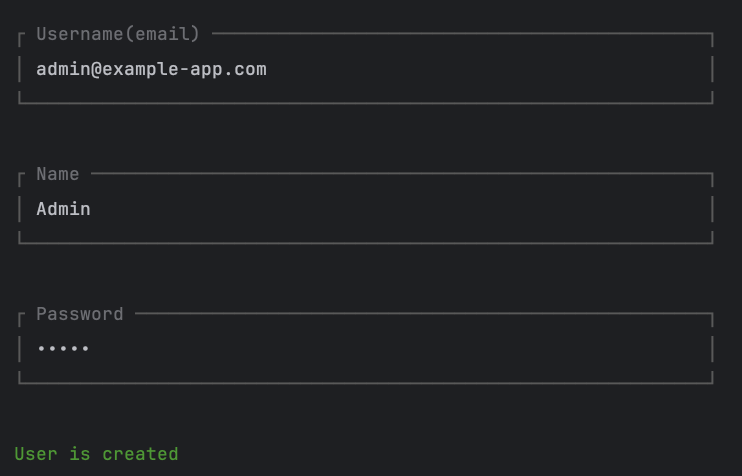
Create the first administrator. Enter e-mail (login), name and password — this will be used to log in.

make-user

3. Run the project

Run the local server:

php artisan serve
php artisan serve

Open in the browser: http://127.0.0.1:8000/admin

Log in with the administrator account.

4. Creating the first resource

Generate the resource for the model (for example, User):

php artisan moonshine:resource User

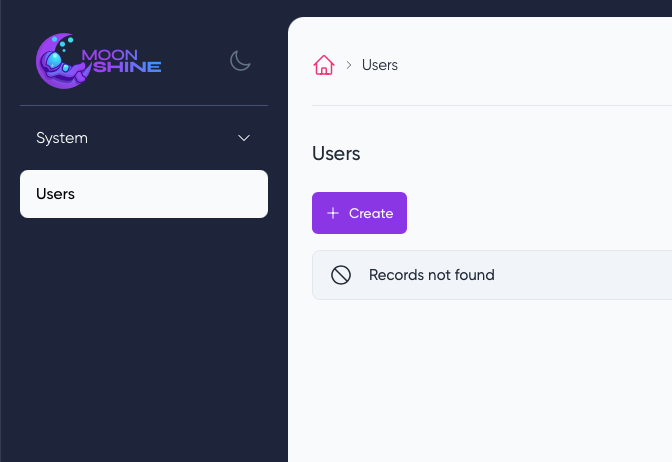
Done! Now the section Users is available in the admin panel.

http://127.0.0.1:8000/admin/resource/user-resource/index-page

You will also find it in the menu.

user-resource

5. Adding fields to the resource

The section is added, but if you open record creation, you'll see a blank page. Let's fix that.

Here is how a new resource looks right after creation:

/**
* @extends ModelResource<User>
*/
class UserResource extends ModelResource
{
protected string $model = User::class;
 
protected string $title = 'Users';
 
protected function indexFields(): iterable
{
return [
ID::make()->sortable(),
];
}
 
protected function formFields(): iterable
{
return [
Box::make([
ID::make(),
]),
];
}
 
protected function detailFields(): iterable
{
return [
ID::make(),
];
}
 
protected function rules(mixed $item): array
{
return [];
}
}

Let's change the section title by adding the method getTitle() for easier future localization:

public function getTitle(): string
{
return __('Clients');
}
public function getTitle(): string
{
return __('Clients');
}

It's also recommended to specify $column, to change the displayed field during ties. Instead of id, we indicate email:

protected string $column = 'email';

Now let's add form fields. We use Text, Email, Password and components for the best structure:

protected function formFields(): iterable
{
return [
Grid::make([
Column::make([
Box::make('Contact information', [
ID::make()->sortable(),
Text::make('Name'),
Email::make('E-mail', 'email'),
]),
 
LineBreak::make(),
 
Box::make('Change password', [
Password::make('Password')
->customAttributes(['autocomplete' => 'new-password']),
 
PasswordRepeat::make('Password repeat')
->customAttributes(['autocomplete' => 'confirm-password']),
]),
]),
]),
];
}

Let's add validation:

protected function rules(mixed $item): array
{
return [
'name' => 'required',
'email' => [
'sometimes',
'bail',
'required',
'email',
Rule::unique('users', 'email')->ignore($item->id),
],
'password' => !$item->exists
? 'required|min:6|required_with:password_repeat|same:password_repeat'
: 'sometimes|nullable|min:6|required_with:password_repeat|same:password_repeat',
];
}

6. Filtering records

Add filter by email:

protected function filters(): iterable
{
return [
Text::make('E-mail', 'email')
->onApply(fn(Builder $query, ?string $value) => $value === null ? $query : $query->whereLike('email', "%$value%")),
];
}
protected function filters(): iterable
{
return [
Text::make('E-mail', 'email')
->onApply(fn(Builder $query, ?string $value) => $value === null ? $query : $query->whereLike('email', "%$value%")),
];
}

7. Branding

Configure logo and color scheme в App\Providers\MoonShineServiceProvider.php:

$config
->logo('/images/logo.png')
->logo('/images/logo-mini.png', small: true);
 
$colors
->primary('#2563EB')
->secondary('#93C5FD');
$config
->logo('/images/logo.png')
->logo('/images/logo-mini.png', small: true);
 
$colors
->primary('#2563EB')
->secondary('#93C5FD');

8. Localization

Configuration локализации в config/moonshine.php:

'locale' => 'ru',
'locales' => [
'en',
'ru'
],
'locale' => 'ru',
'locales' => [
'en',
'ru'
],

Language files should be located at /lang/vendor/moonshine. You can find them in the section Plugins or create them manually.

9. Documentation

We have installed MoonShine, configured a resource, added fields, filters, branding and localization.

We recommend checking out documentation, recipes and video guides to use all the features of the platform.

Important sections:

Thanks for choosing MoonShine!